


About this Product
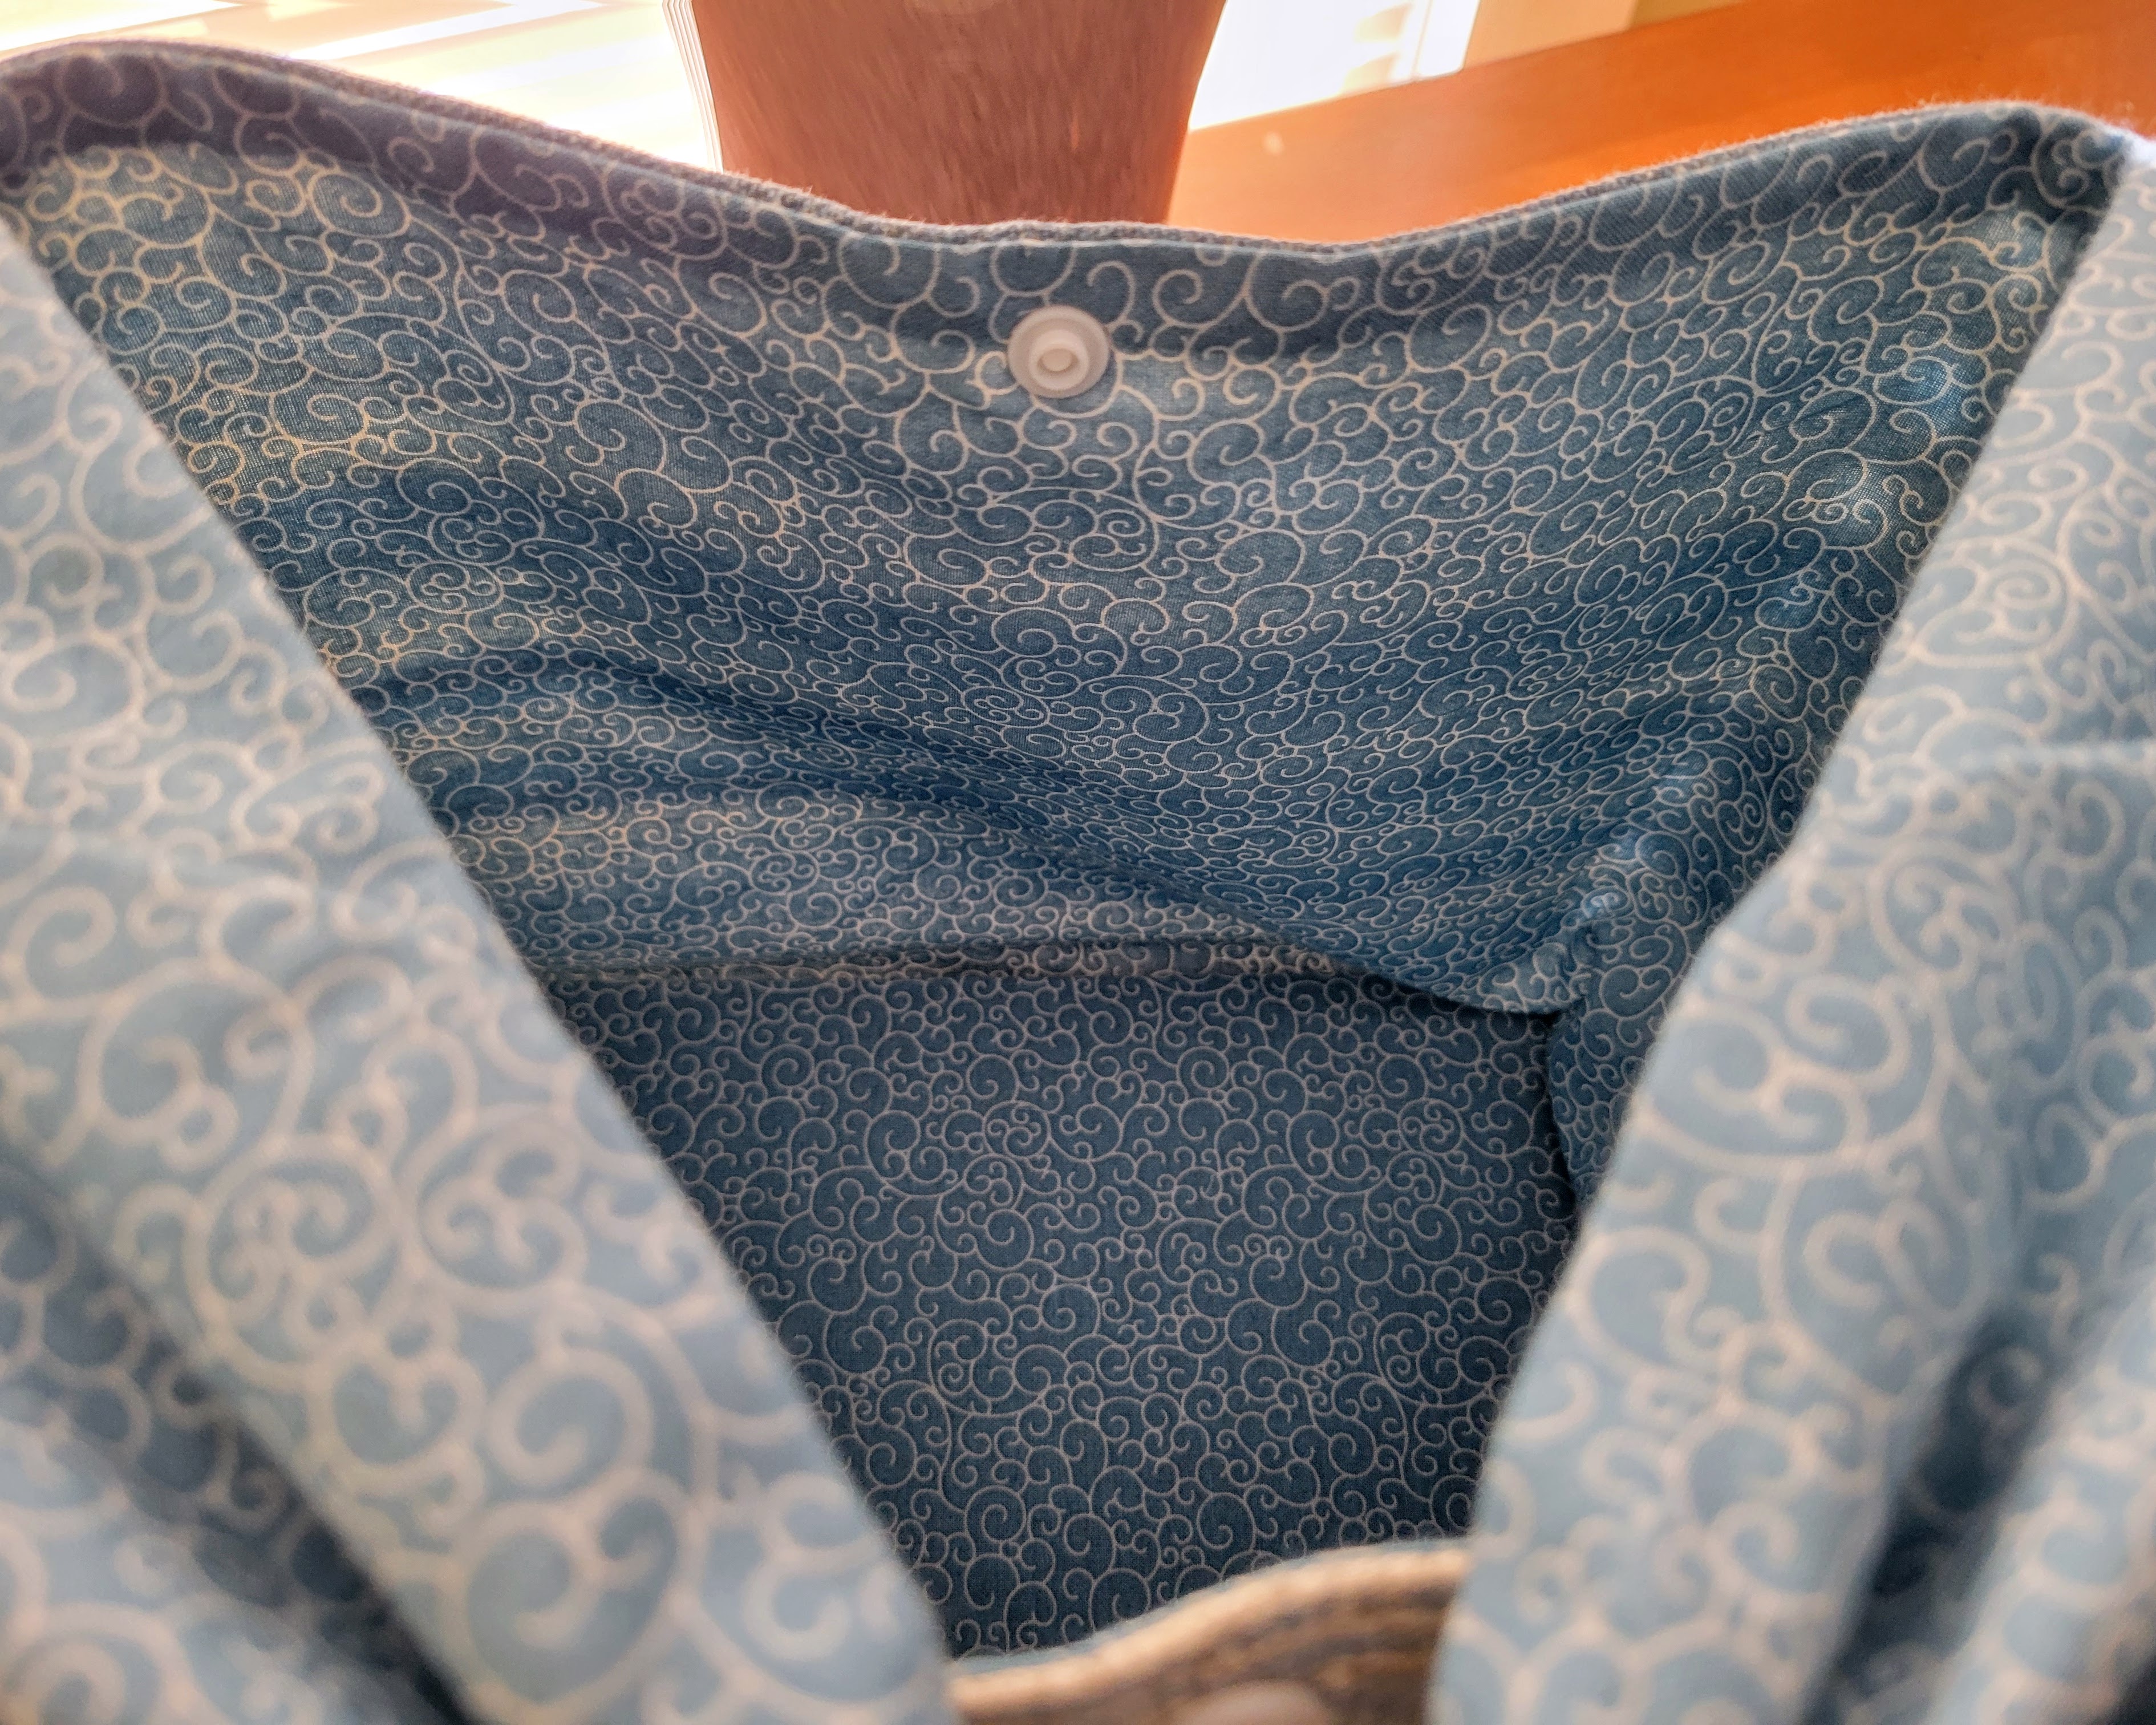
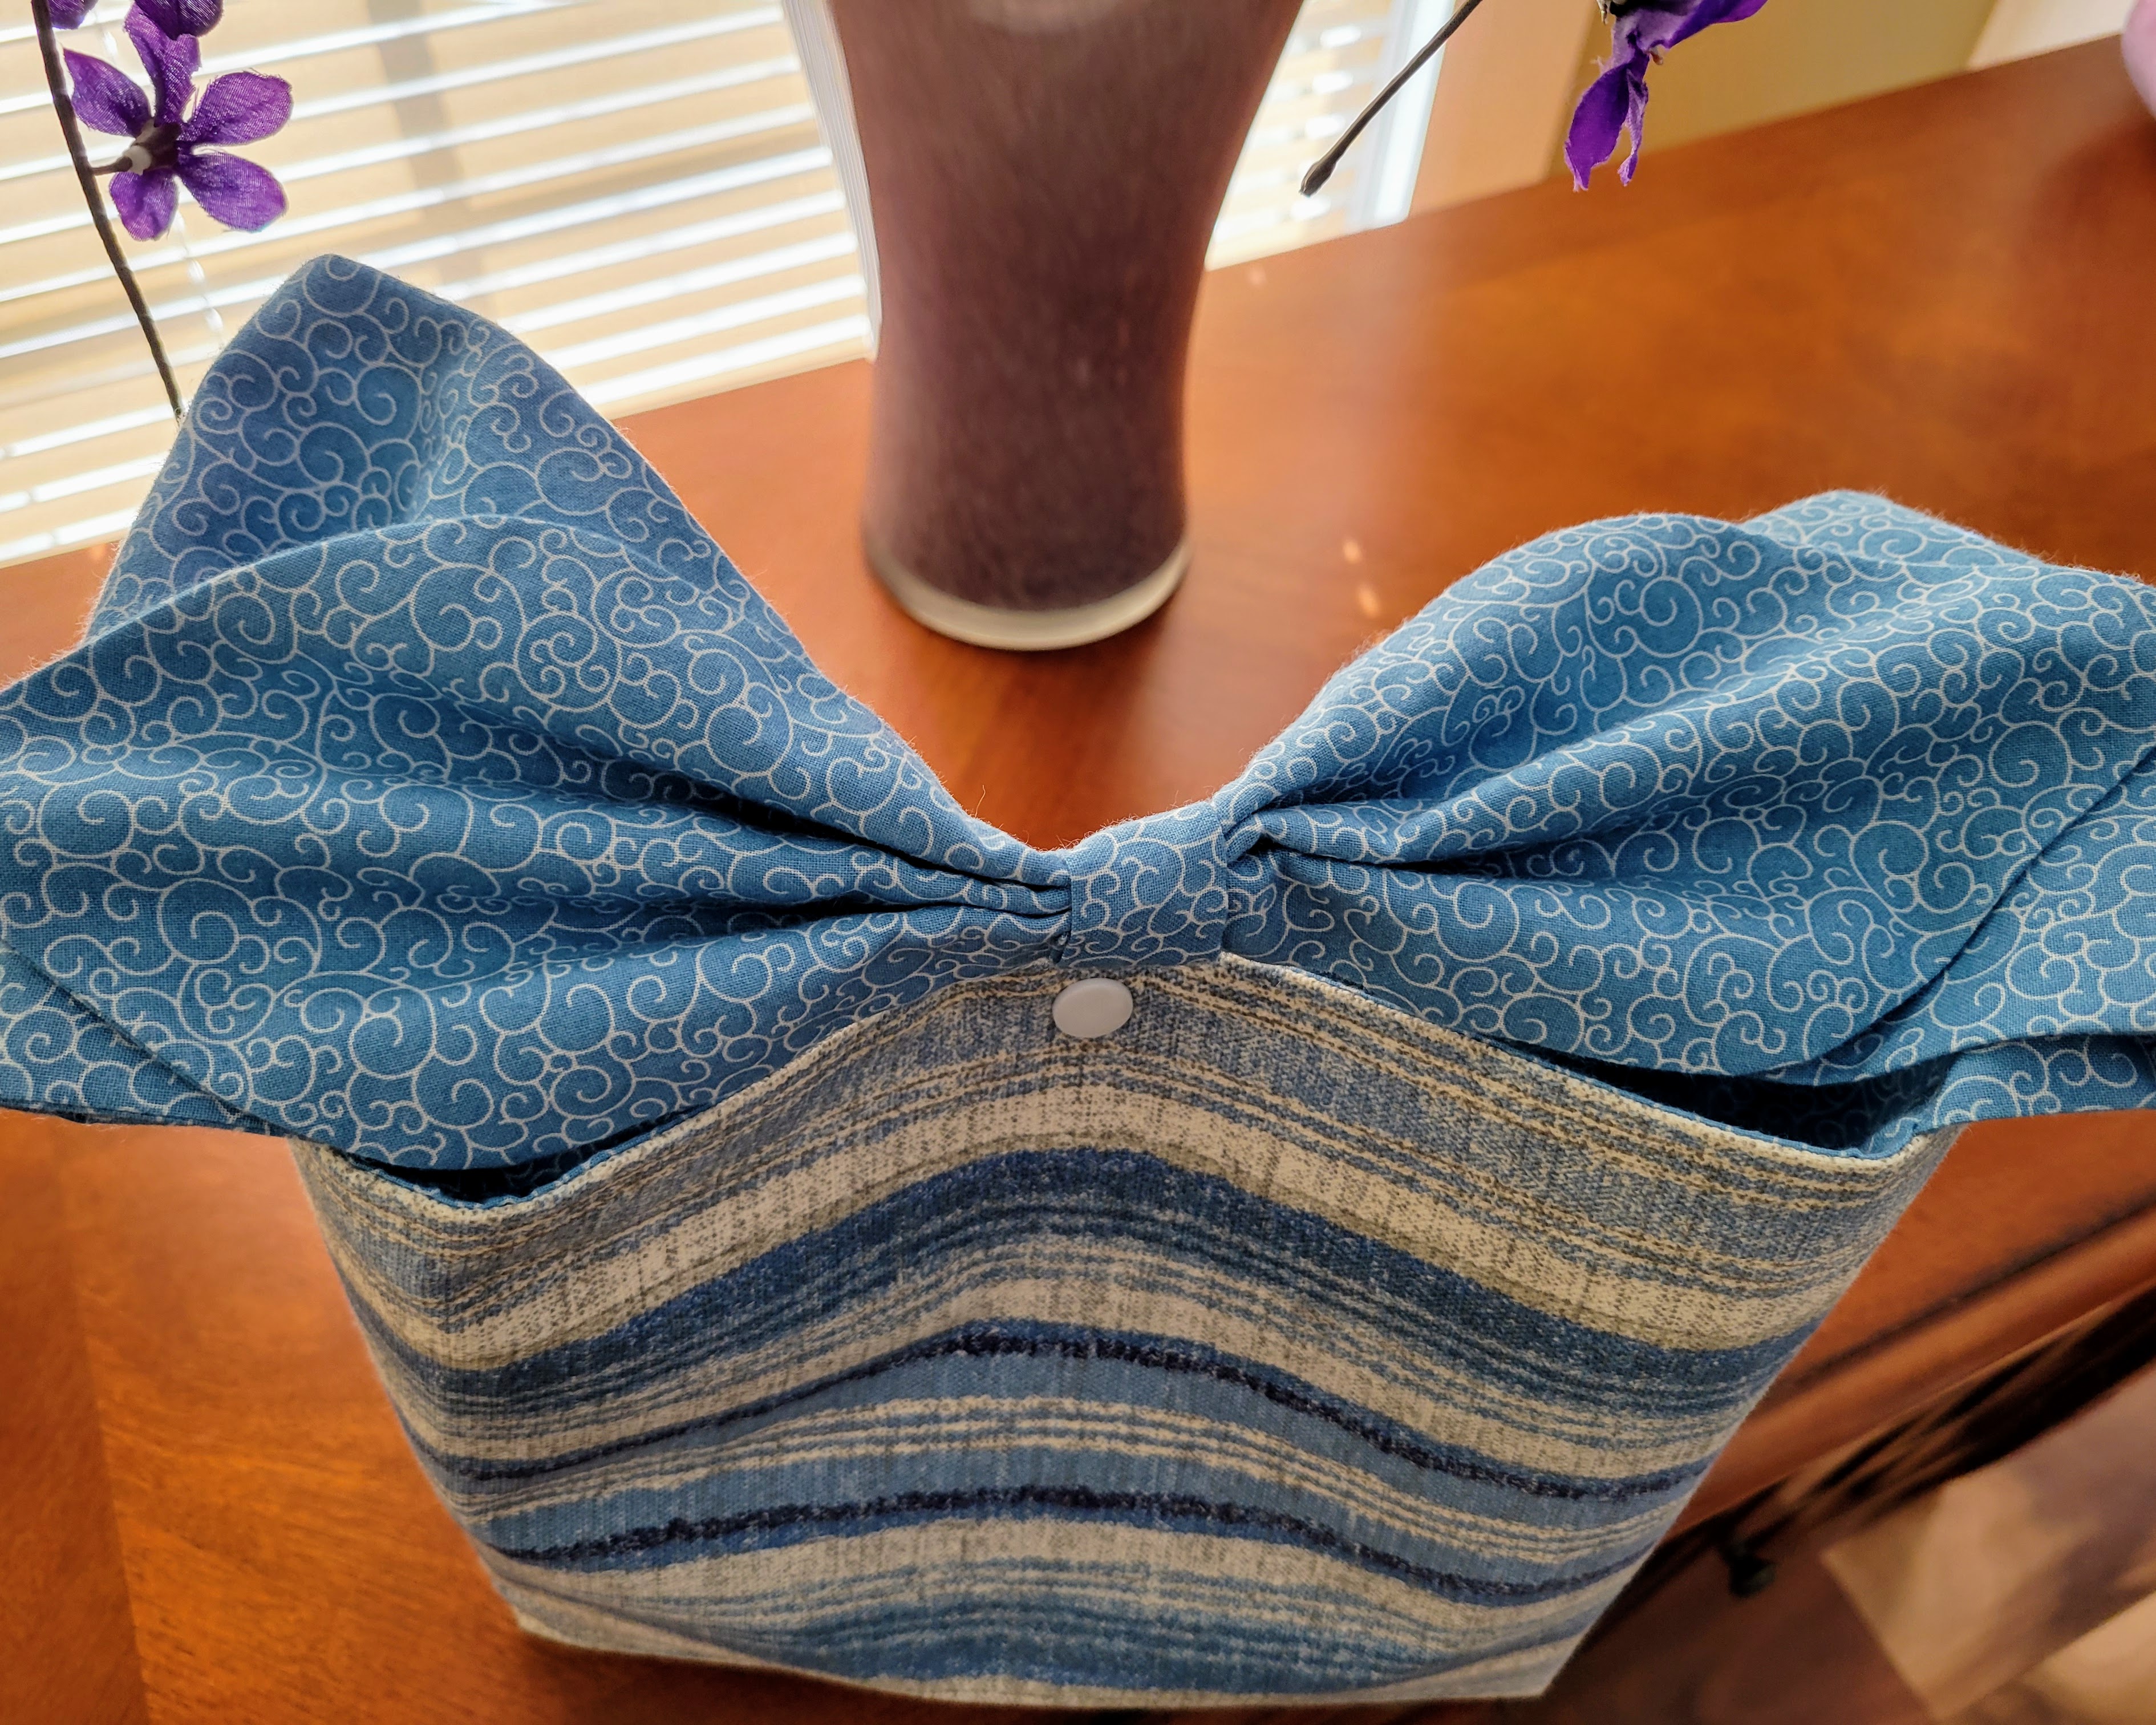
You will always want to take this blue striped purse/tote with you to run errands, or meet a friend for breakfast or lunch. The cotton canvas fabric has blue, gray, and white horizontal stripes and the coordinating cotton fabric lining and bow handle is a pretty shade of blue with white swirls. Both fabrics complement each other and will perfectly match a jeans and sweater outfit, gray slacks with a blue and gray blouse, or a denim dress. I used a cute round blue snap for easy opening/closing. This purse/tote is a large size. It measures 8 1/2" in height, 9 1/4" wide, and 5 1/2" deep. The bow on the handle is 11 1/2" long with a total handle length of 15"
Bows Buttons & Baubles
Meet the Maker
Hello! My name is Jeanette, and I was born and raised on Long Island in New York State. I am a mother of two grown children and a grandmother of one teenage girl, and currently live in upstate New York. I have a passion for crafts. I learned to crochet at 8 years old by my maternal grandmother. I was always making potholders on a loom to give to my mother. At age 14, my grandmother and my mother taught me how to sew. I learned on a very old Singer machine with a foot pedal, but my grandmother gave me a brand new "electric" machine for my 17th birthday. I made clothes for myself, mostly dresses and skirts. At age 22, I even made my own wedding gown. Over the years, I made clothing for both my children, but I eventually stopped sewing for quite a while.
Within the last few years, I returned to using my sewing machine, and I am loving it all over again. This past summer (2023), I began making fabric hair bows. I have been searching to find my crafting niche, and I have discovered that making fabric hair bows is it. Since April, 2023, I have created over 250 bows. I have 12 different styles that I sew, some with long tails, some with medium length tails, some with short tails, some with no tails. Each bow is unique because of the fabrics I choose and the types of embellishments I use to enhance the look of each bow. I like to use buttons, gems, charms, lace, and fabric flowers to give my bows that extra something. I truly hope you will search through my products to not only see what I create, but to also be motivated to place an order, which in turn will help children in need. Goimagine donates 100% of its profits to children's charities.
As of July, 2024, I am adding headbands to my product listings. I currently have 3 different styles that are made in sizes for adults/teens, children, toddlers, and infants.

How it’s Made
After choosing the cotton canvas fabric for the outer purse and the cotton fabric for the handle and lining, I traced my pattern on the back of each piece of fabric and proceeded to cut out the pieces. I then ironed each pattern piece. I traced the body pattern on a piece of stiff iron-on interfacing and cut it out. The first step is to carefully fuse the interfacing to the back of the cotton canvas. This gives the purse the stiffness it needs to stand on its own. With the right sides together, I sewed the sides of the purse. To form the bottom, squares of fabric were cut out on each side of the bottom corners. They were then sewn in a way that gives the purse/tote its rectangular shape. The body of the bag is then turned right side out. Putting the main bag aside, I sewed the two handle pieces together. They each were sewn to each side of the tote. Now it was time to sew together the lining in the same manner as the body of the bag was sewn. The only difference was to leave a 3" opening on one side of the lining for turning it out. Leaving the lining inside out, I placed the canvas body inside the lining making sure that the right sides were together and the seams were lined up. It was pinned in place and sewn together around the top of the bag. Using the opening in the lining, I proceeded to pull the main body of the tote through, then pushed the lining into the bag. I ironed the seam around the top of the bag. Voila, there is the purse! I cut out a piece of corrugated cardboard to the size of the bottom of the bag, covered it with a piece of lining fabric and gently placed it in the bottom of the bag giving it the rectangle shape that is needed. I formed a bow out of the two handle pieces by folding the fabric in a certain way, tied it together in the center with strong thread. The thread was covered with a strip of the lining fabric. The very last step wss attaching a cute snap to close the bag when necessary.


