


About this Product
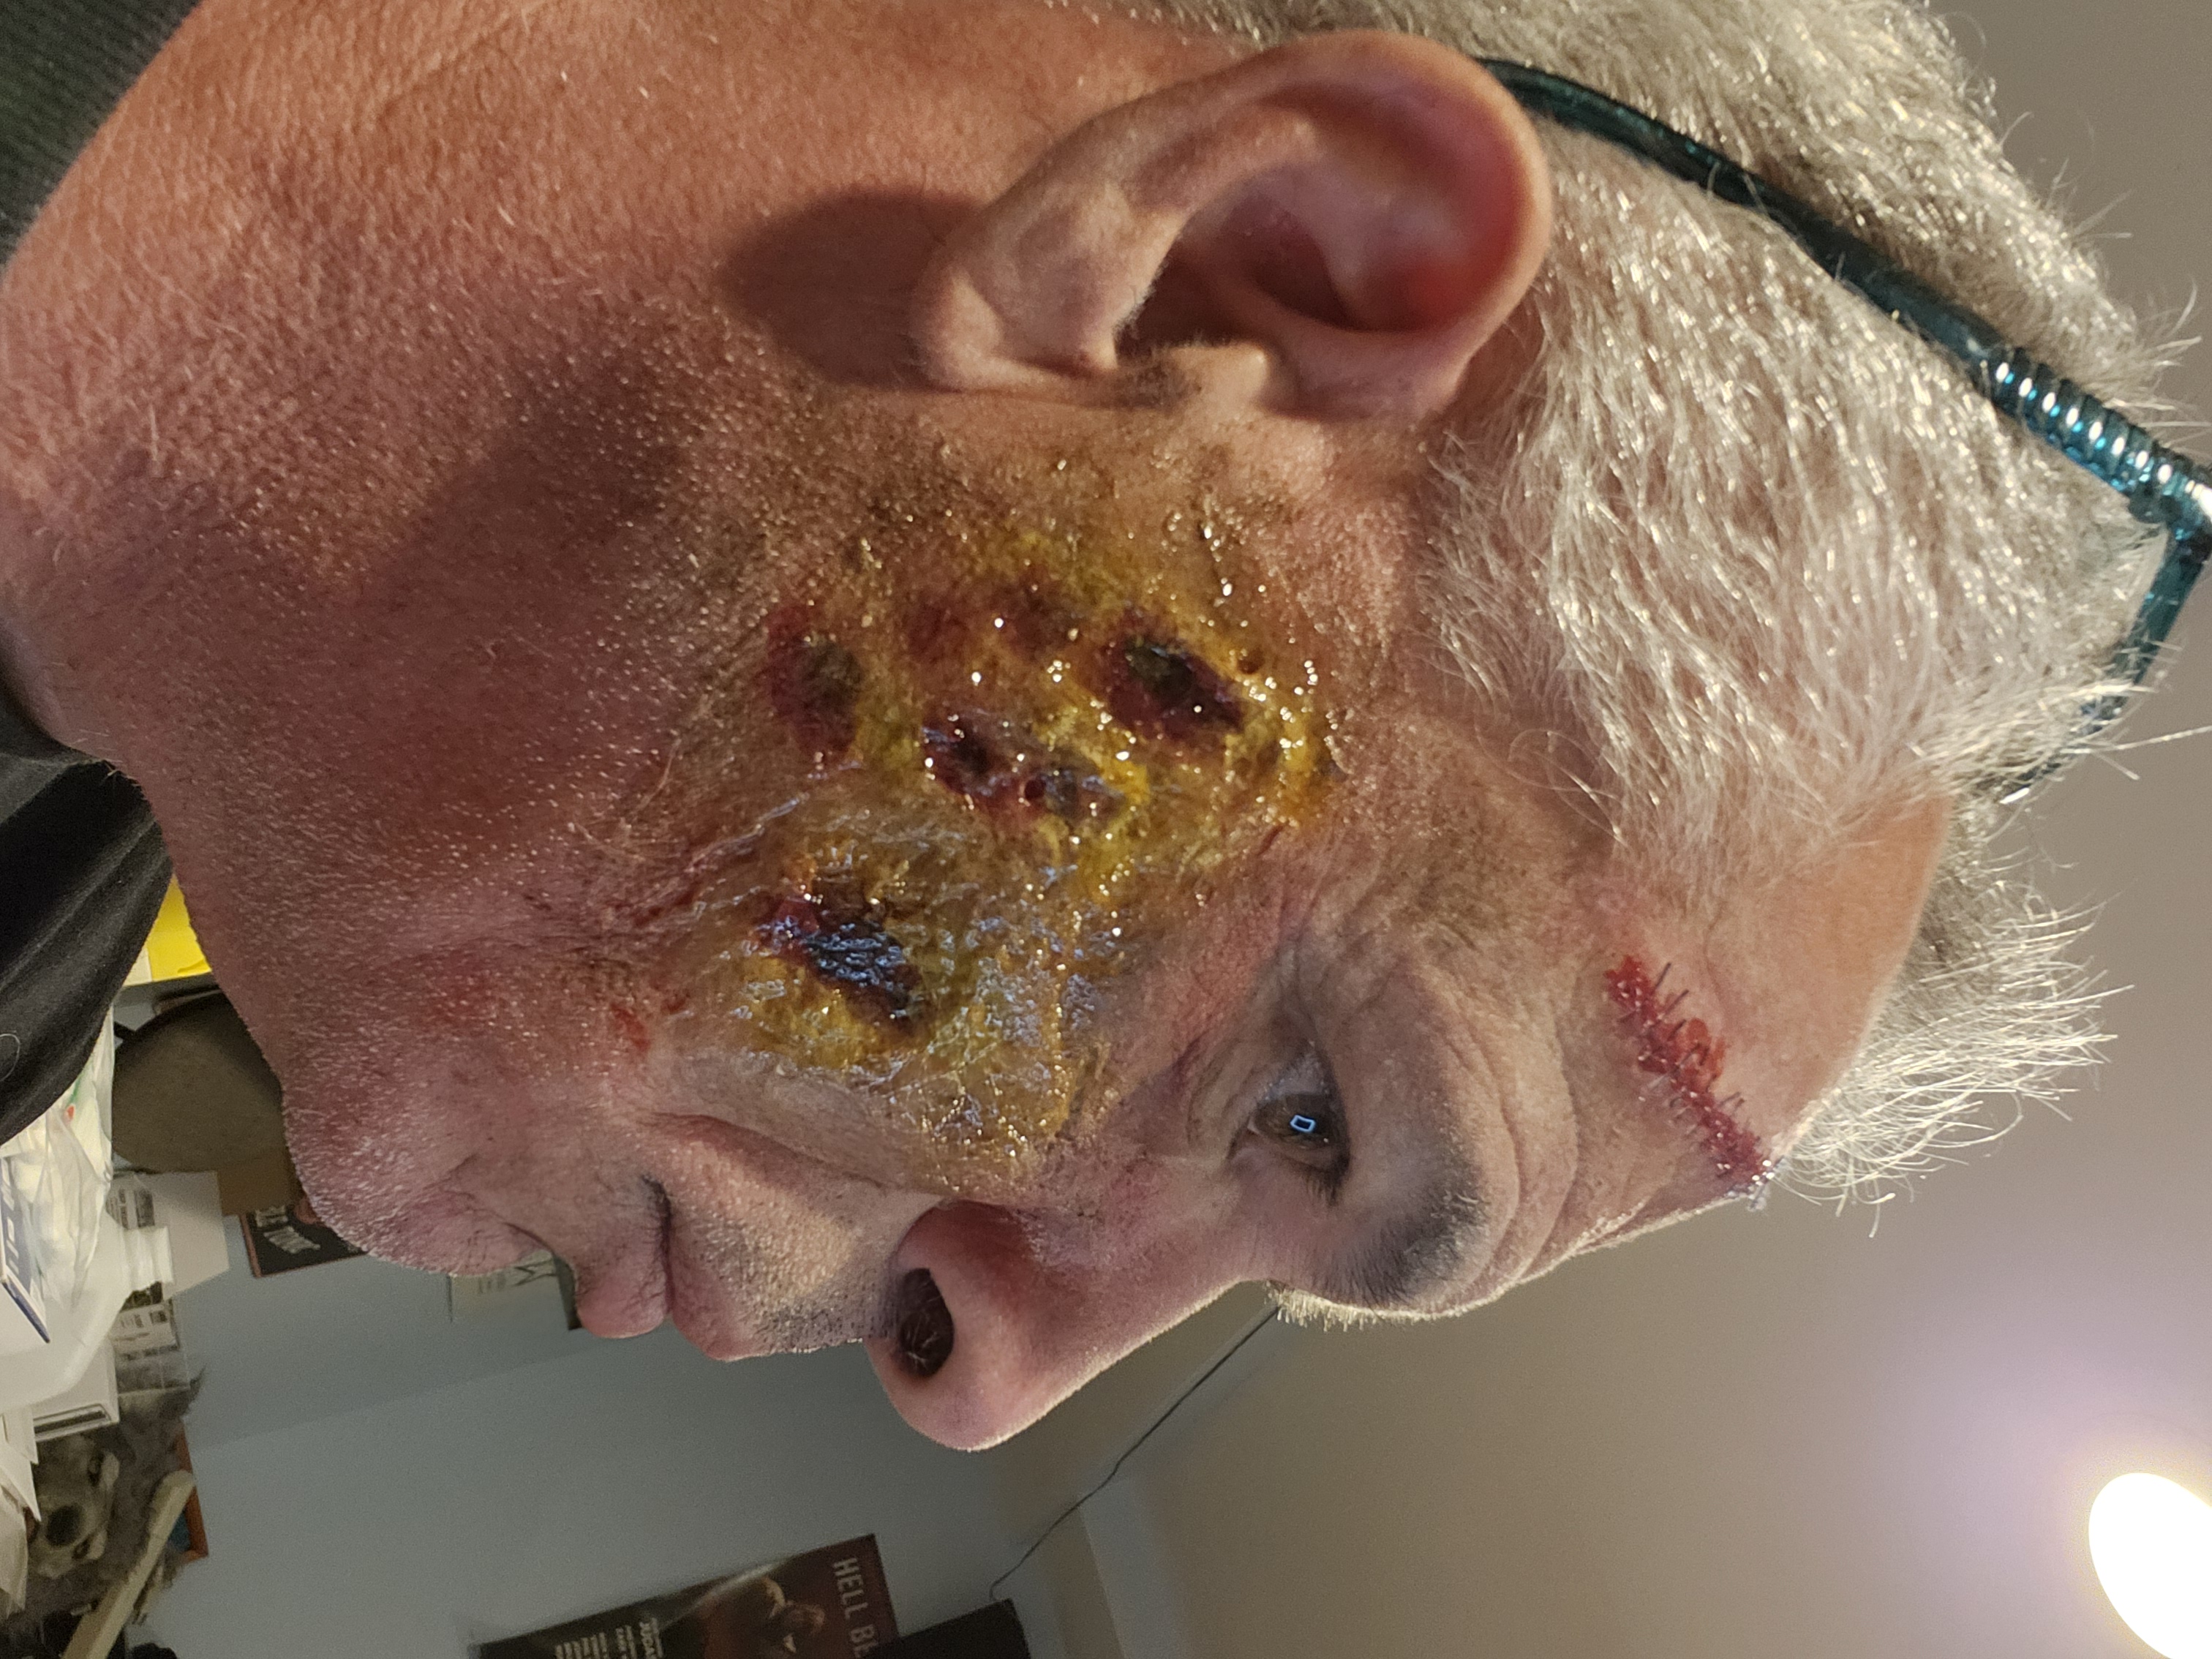
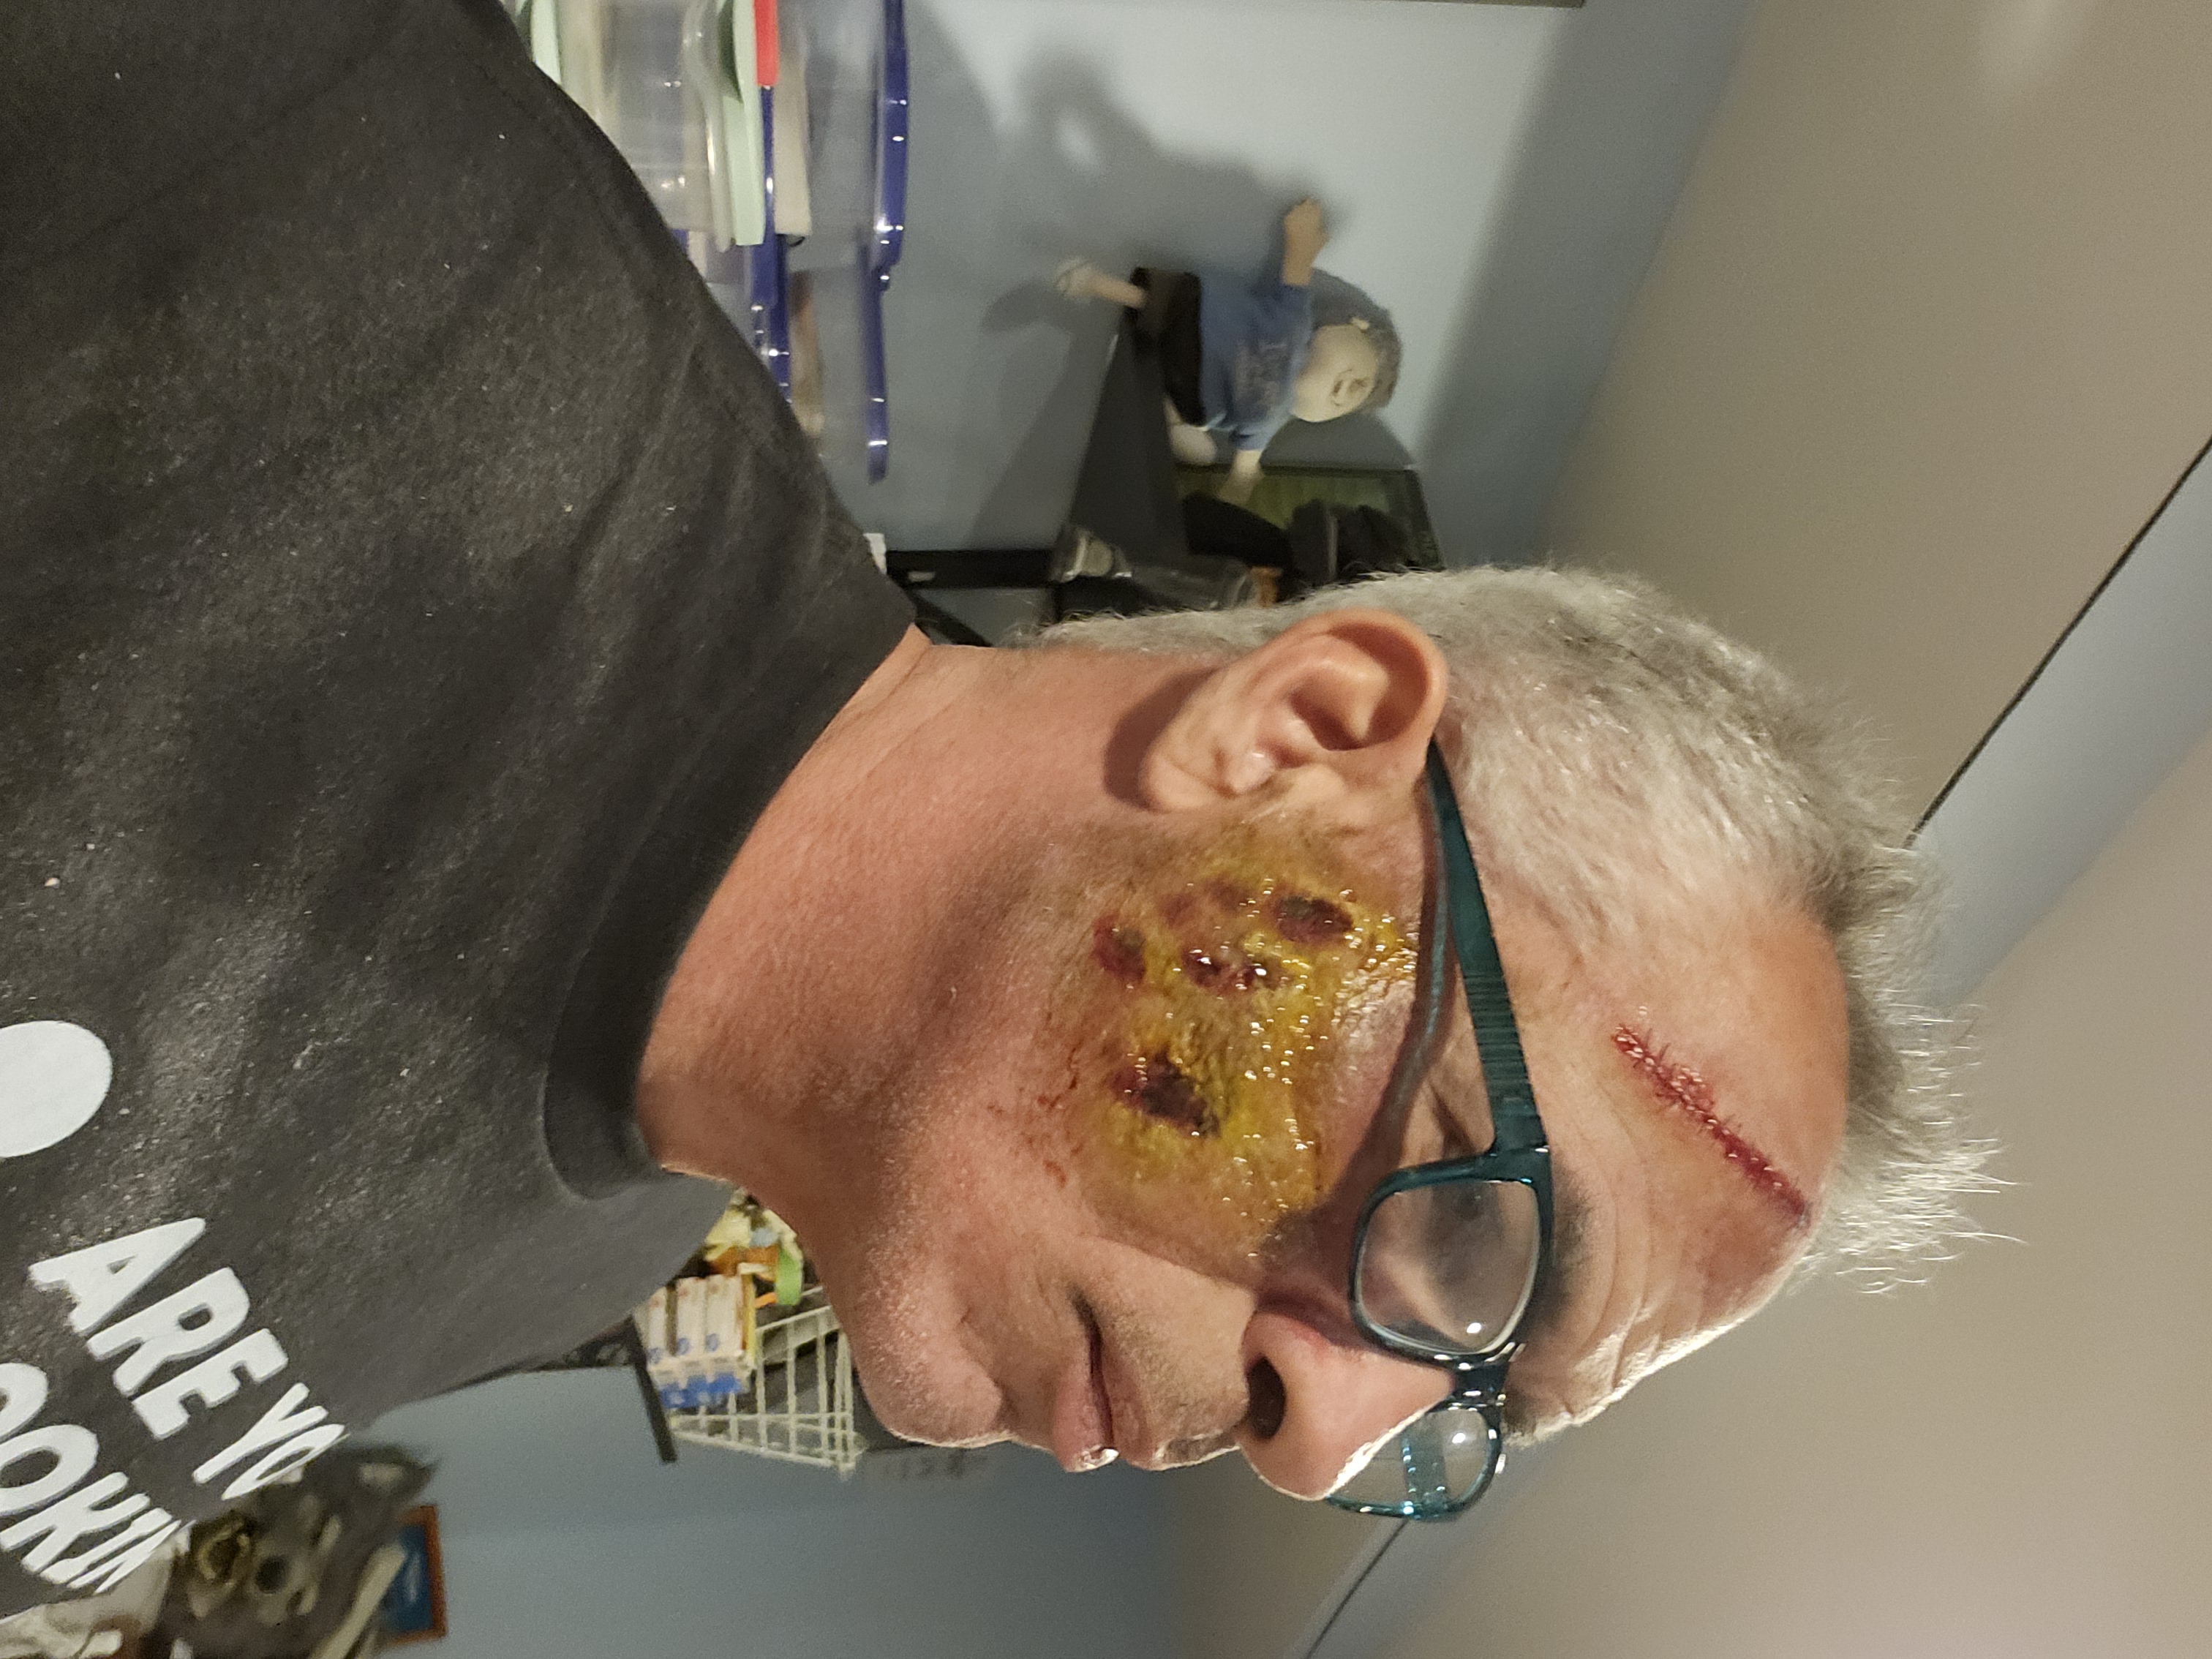
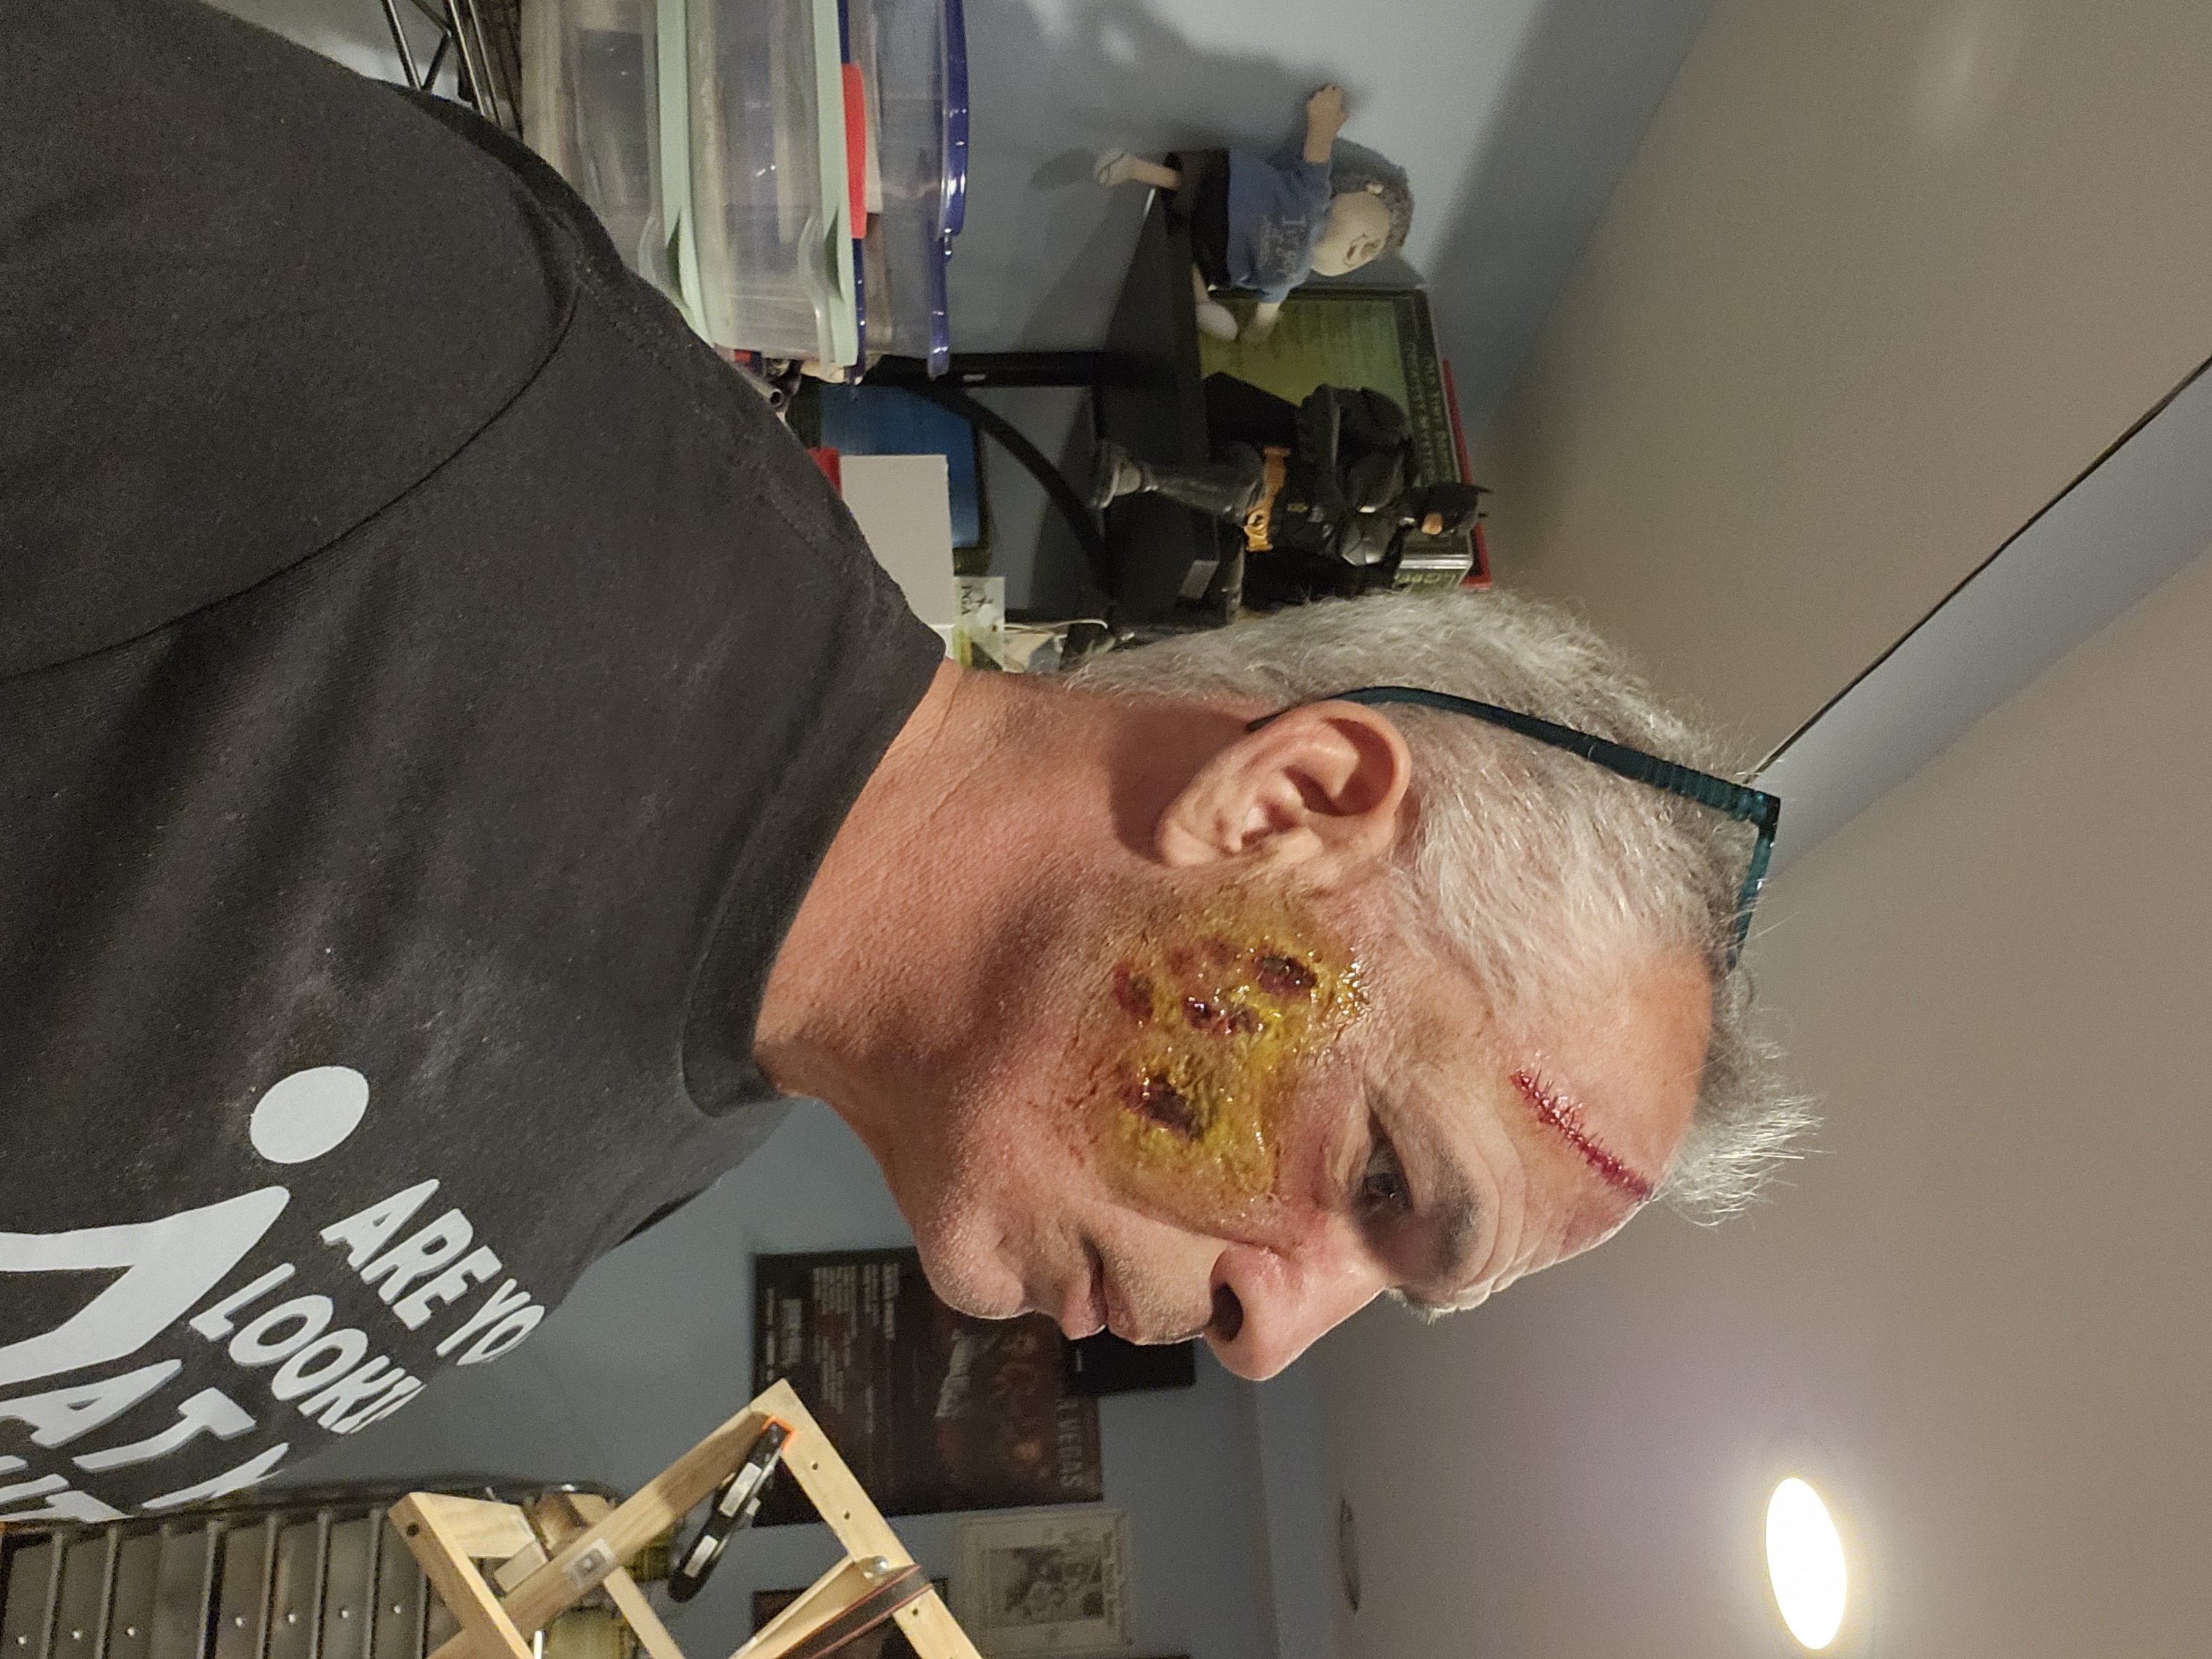
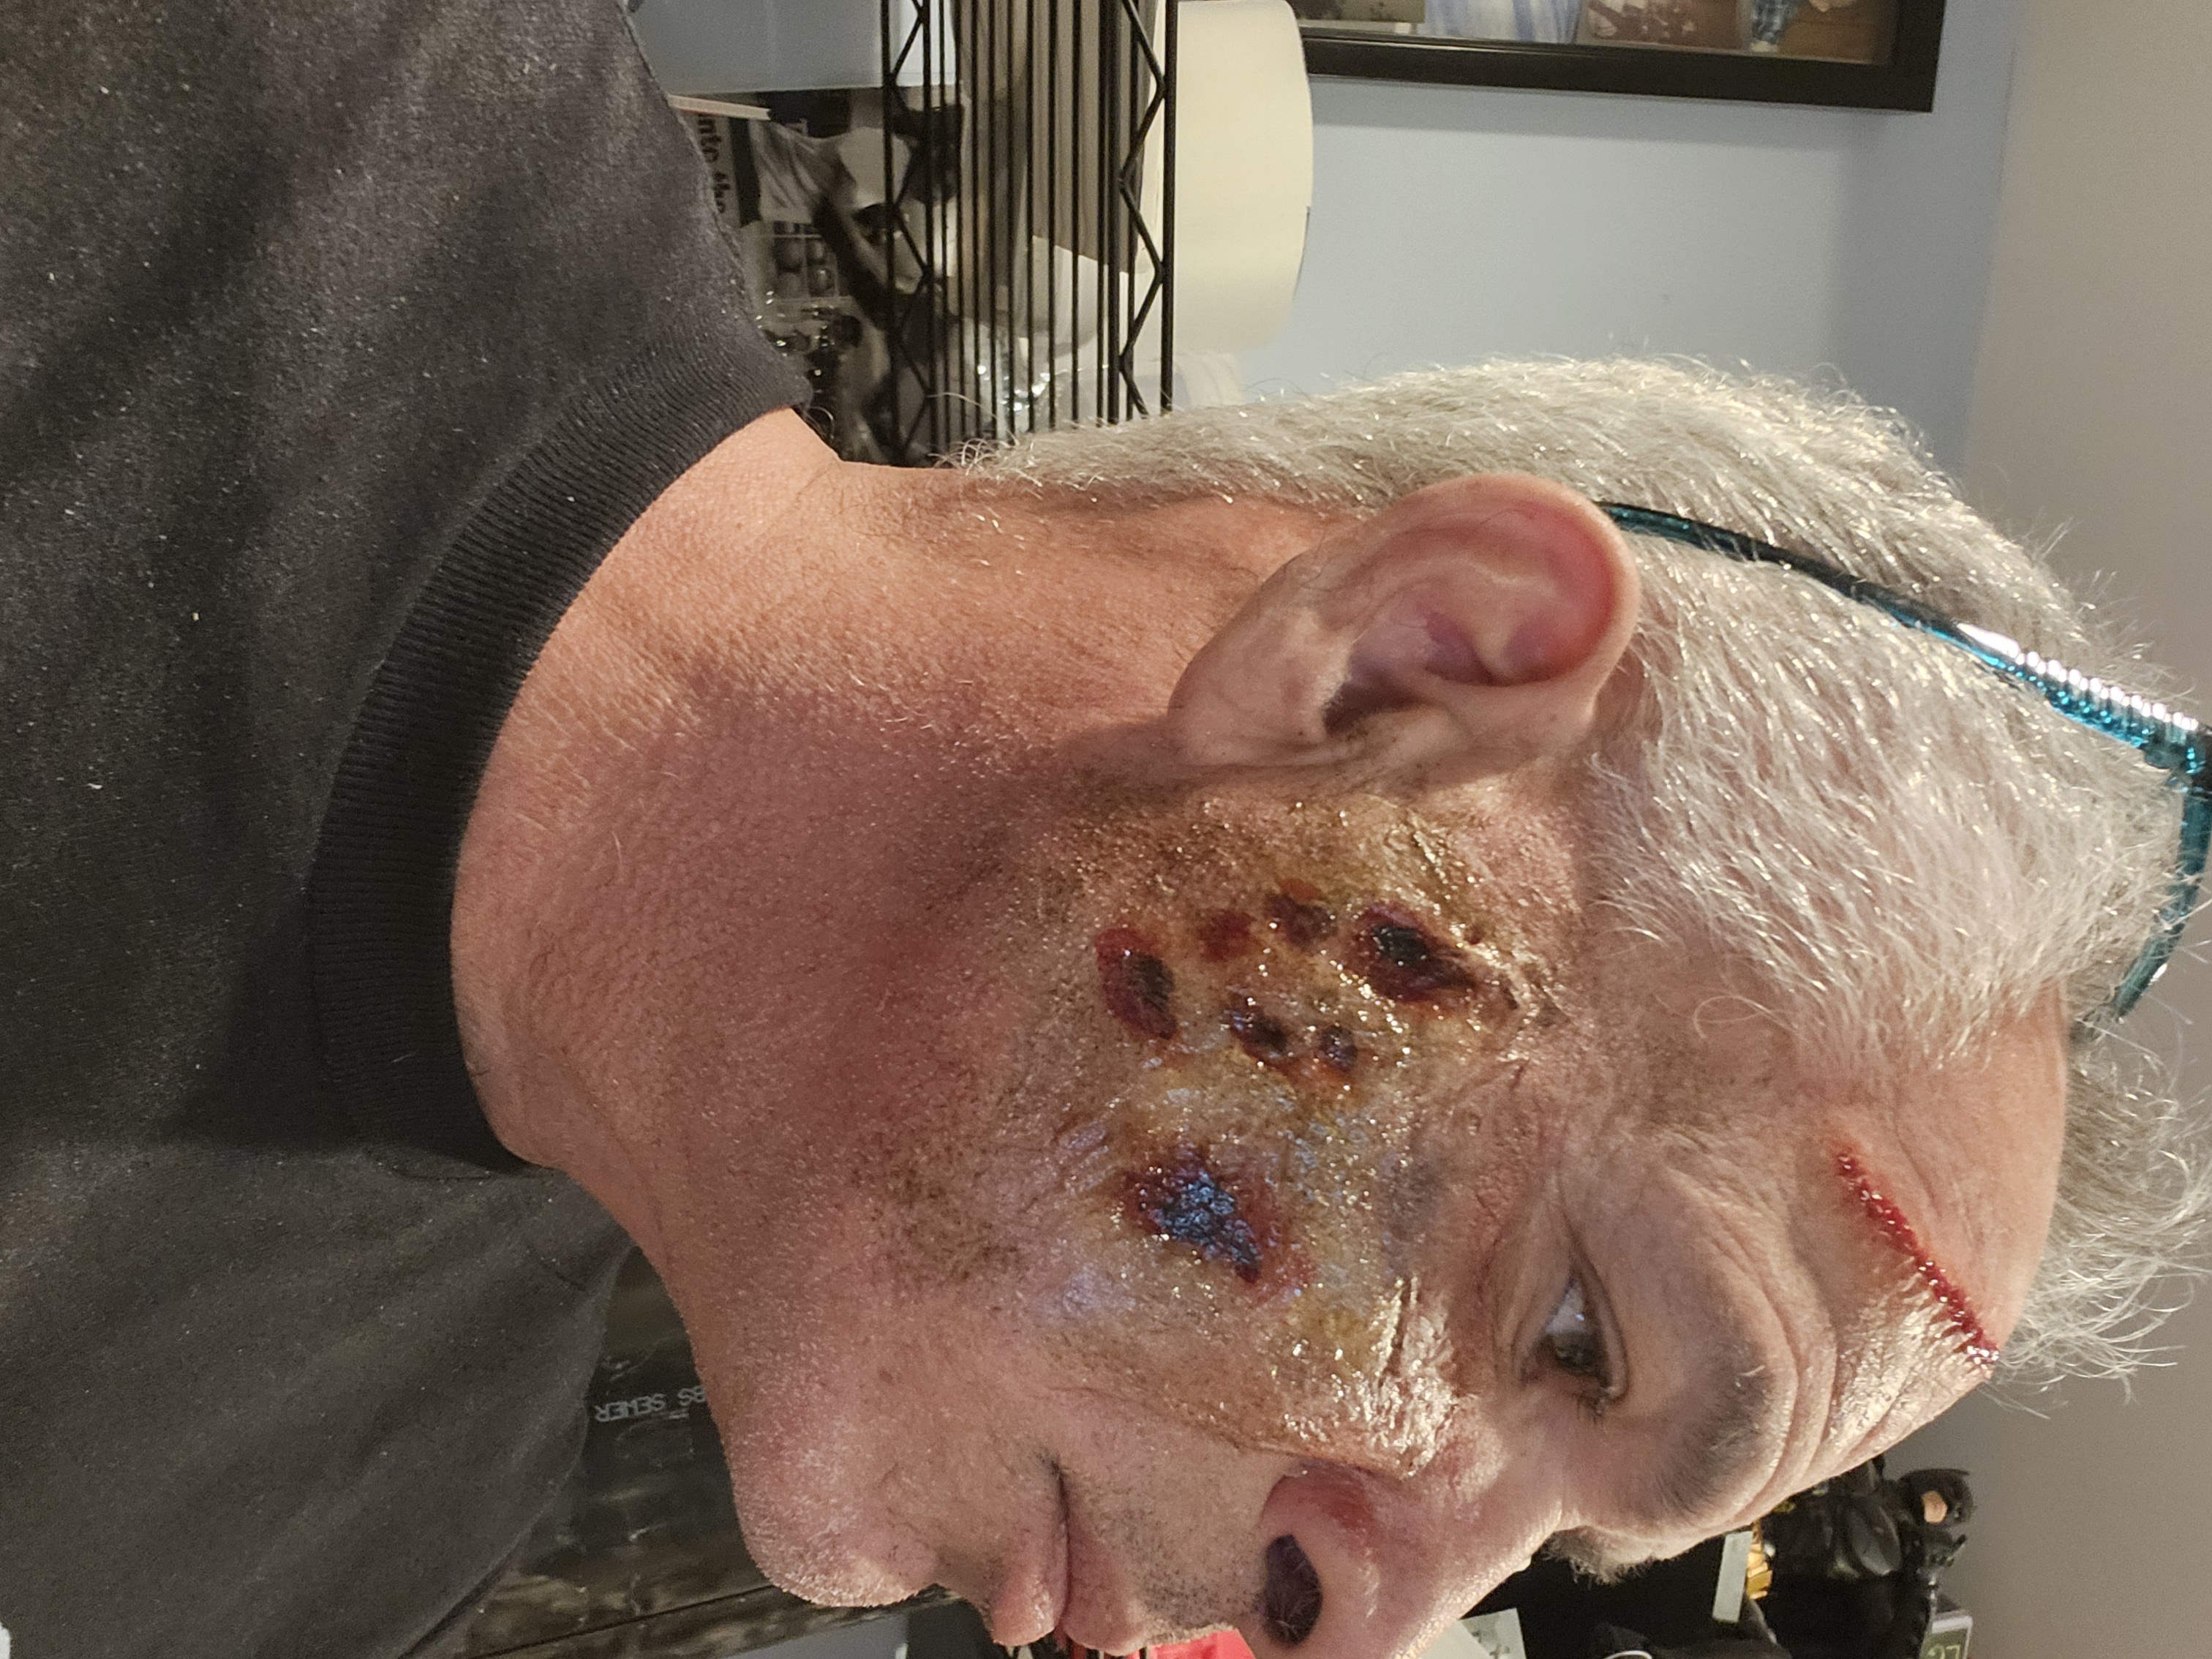
Latex Zombie Cheek Appliance – Realistic Infectious Wound Transfer.
Transform your look with our **Latex Zombie Cheek Appliance** designed for ultimate realism!
This high-quality prosthetic transfer mimics the appearance of an infected wound, perfect for Halloween, cosplay, or any spooky themed event.
Key features include: -
**Realistic Design:** Crafted to simulate the texture and depth of a rotting wound or zombie cheek, ensuring your costume stands out. -
**Easy Application:** This latex appliance is user-friendly and can be applied directly to the skin with minimal setup, allowing for a hassle-free experience.
- **Durable Quality:** Made from high-grade latex, our appliance is durable for multiple uses, making it an ideal addition to your makeup kit.
- **Versatile Use:** Perfect for Halloween costumes, horror films, theater productions, or any event where you want to create an alarming, undead appearance.
- **Customizable:** The transfer can be painted or shaded for added depth, allowing you to personalize your look as a gruesome zombie or an infected character.
Hauntingly evil SFX

Meet the Maker
Hauntingly evil SFX:
Hello all,
I’m a self taught SFX creator. I just love doing it. My work space is in my basement. I really enjoy making prosthetics. They can be very time consuming and sometimes pricey, but it’s all worth it once you apply them and completely change yourself from human to monster. I started out making my own prosthetics while working at a haunted house. I wanted my characters to be as realistic, disgusting and evil as possible, without wearing a mask. I have achieved that on several occasions.
I hope that I can help you achieve that as well.
If anyone has any questions please don’t hesitate. Feel free to contact me anytime. My goal is to get back to you within 24 hours.
Thanks for visiting my shop and I hope that I can help you out with something in the very near future.
Guy

How it’s Made
Creating a latex appliance like a zombie cheek from scratch can be a rewarding process, and it's great that you're doing it in your home basement shop! Below is a personalized guide describing the steps involved in crafting a latex prosthetic, including some tips specific to your home setup. ### How to Create a Latex Zombie Cheek Appliance from Scratch **Materials Needed:** 1. Liquid latex2. Clay (such as non-drying or modeling clay)3. Sculpting tools4. Casting material (such as plaster or alginate, if making a mold)5. Face-safe adhesive (like Pros-Aide)6. Skin-safe paint (like alcohol-based body paint or airbrush paint)7. Baby powder or cornstarch (for drying)8. Paper towels for cleanup **Step-by-Step Guide:** 1. **Design Your Zombie Cheek:** - Start by sketching your design concept. Think about the level of detail you want, such as color variations, textures, and the exact shape of the infected wound. - Consider how it will fit on your cheek, ensuring the design is proportionate to your face. 2. **Sculpting the Base:** - Use clay to sculpt the desired shape of the zombie cheek directly on a mannequin head or a flat surface. Pay attention to details like the contours of the skin, the edges of the wound, and any raised areas to create depth. - You may want to add texture using sculpting tools to simulate torn flesh or decay. 3. **Creating the Mold:** - Once you're satisfied with your clay sculpt, make a mold using plaster or alginate. - If using plaster, apply a release agent (like petroleum jelly) to your sculpt to prevent it from sticking. - Pour the plaster over the sculpt and allow it to set completely before carefully removing the mold. 4. **Making the Latex Appliance:** - Once the mold is ready, pour liquid latex into it. Swirl it around to evenly coat the insides, pouring out any excess. - Allow it to dry (this can take several hours). You may need to repeat the process to build up the desired thickness. - Once fully cured, carefully peel the latex prosthetic from the mold. 5. **Preparing the Appliance:** - Trim any excess edges and refine the shape to ensure it fits seamlessly on your cheek. - To soften the latex for better application, you can lightly heat it with a hairdryer for a few seconds. 6. **Painting and Detailing:** - Use skin-safe paints to add realistic color. Start with a base layer, then add darker shades and highlights to emphasize depth and texture. - For a truly gruesome look, incorporate shades of green, purple, and brown to mimic decay and infection. 7. **Application:** - When you're ready to wear your zombie cheek appliance, use a face-safe adhesive (like Pros-Aide) to attach the latex piece to your cheek. - Blend the edges of the appliance into your skin using additional makeup to create a seamless transition. 8. **Finishing Touches:** - Set your look with baby powder or cornstarch to reduce shine and enhance realism. - Add any final details, such as fake blood or gore, to complete your undead transformation. ### Final Thoughts Creating latex appliances is not only a fun process but also an opportunity to showcase your creativity and craftsmanship. Since you’re working from your home basement shop, experiment with different designs and techniques to find what works best for your unique style. Remember to always prioritize safety, especially when using chemicals like liquid latex. Happy crafting, and may your creations bring all the spooky vibes to life!


