


About this Product
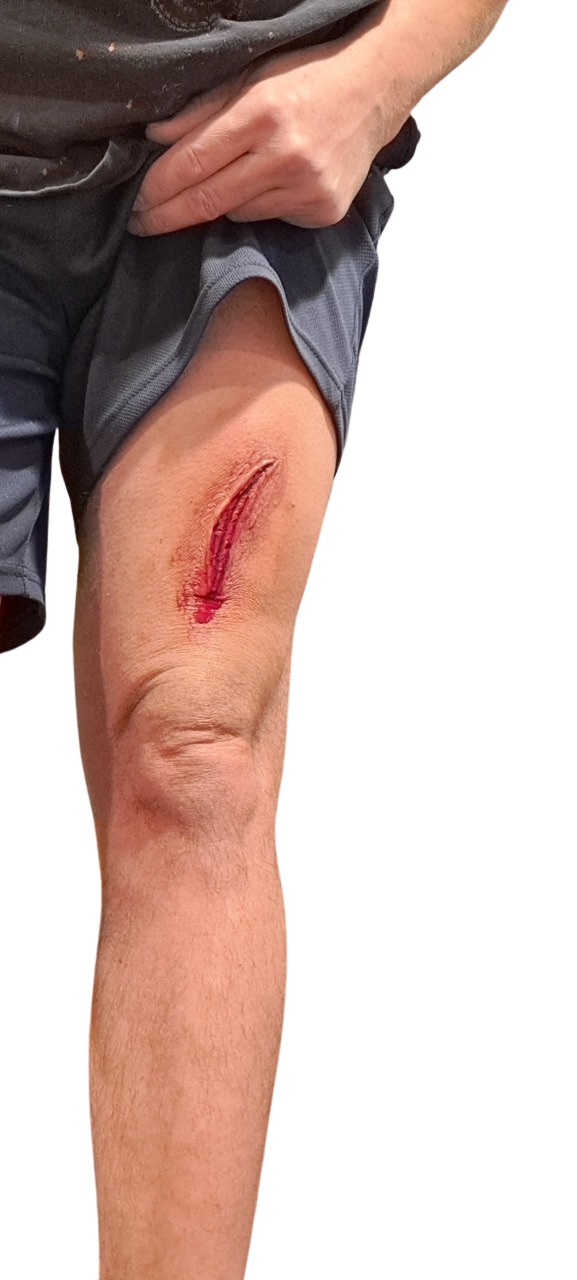
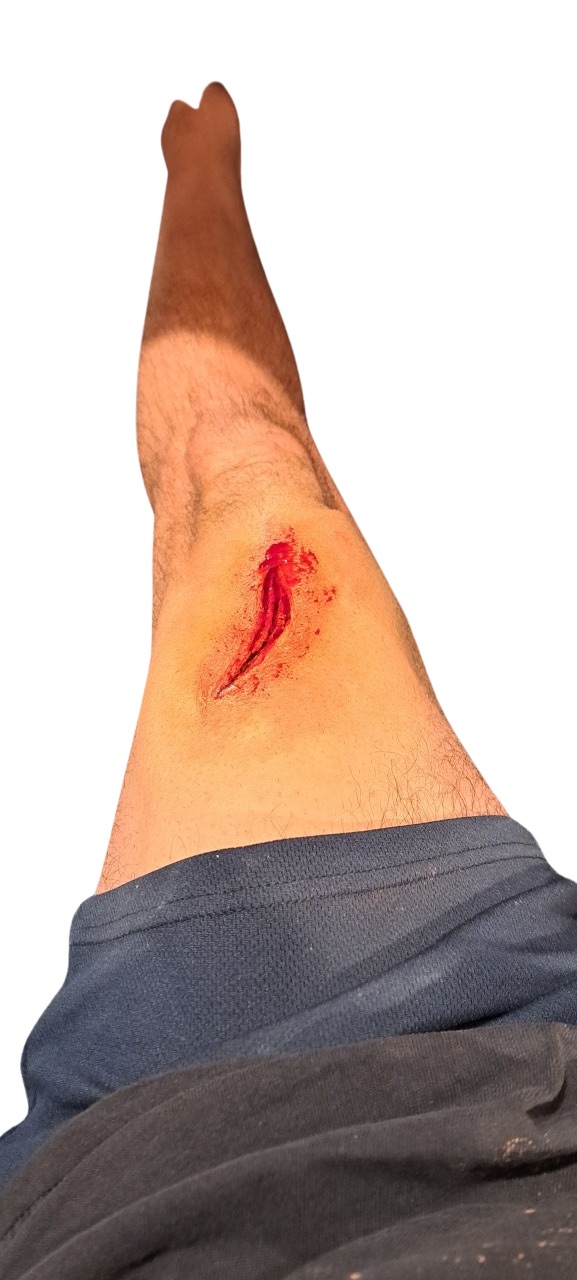
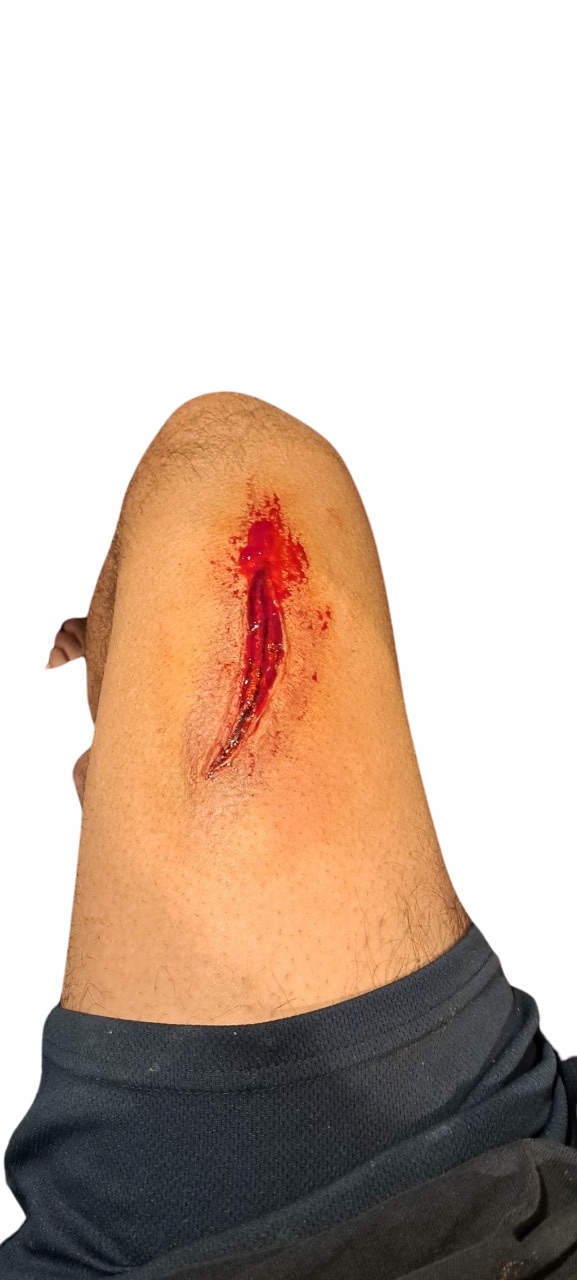
This incredibly realistic latex prosthetic wound simulates a fresh gash or laceration. Expertly crafted to enhance the authenticity of your special effects makeup for Halloween, cosplay, or theatrical performances. Ideal for horror enthusiasts, filmmakers, and makeup artists, this lifelike wound features detailed raised textures. Add your own color variations, while mimicking the look of raw, red skin with a hint of blood. Perfect for creating dramatic characters or adding a shocking twist to your costume, this versatile prop is easy to apply and remove, allowing you to achieve professional-level results. Make your next project unforgettable with this eye-catching prosthetic injury!
Hauntingly evil SFX

Meet the Maker
Hauntingly evil SFX:
Hello all,
I’m a self taught SFX creator. I just love doing it. My work space is in my basement. I really enjoy making prosthetics. They can be very time consuming and sometimes pricey, but it’s all worth it once you apply them and completely change yourself from human to monster. I started out making my own prosthetics while working at a haunted house. I wanted my characters to be as realistic, disgusting and evil as possible, without wearing a mask. I have achieved that on several occasions.
I hope that I can help you achieve that as well.
If anyone has any questions please don’t hesitate. Feel free to contact me anytime. My goal is to get back to you within 24 hours.
Thanks for visiting my shop and I hope that I can help you out with something in the very near future.
Guy

How it’s Made
How I made this appliance.
First I start with Concept and Design.
I Consider whether it will be a cut, bruise, burn, or other forms of injury. Then I do some Research using references for anatomical accuracy and realistic details.
Then I need something to sculpt on.
I decide to use my arm as a base. So in order to do that I needed a mold of my arm.
I used alginate for a quick mold then filled that mold with hydrocal plaster cement. Let it cure and then peel away all the alginate. And boom you have your arm in plaster.
Then it is time to create a sculpture.
I use monster clay to sculpt the wound. This involves forming a variety of textures, such as raised skin for cuts or ruptured areas for deeper wounds. Pay careful attention to details such as edges and the depth of the wound for realism. The one thing you have to pay very close attention to is making sure the edges of your appliance are as thin as possible. You want to have very thin edges so the piece seems to be part of your own skin. Adding a clay flashing around your sculpt is very important for this.
Then it is time to make the mold.
I use ultracal plaster cement and a fiber for extra strength.
Before adding the plaster you have to make sure you put a release agent on your clay sculpt. This makes sure that your plaster doesn’t stick to the clay and base.
After mixing the plaster you brush on a few layers, making sure you get all the detail. Then you begin to build the plaster around your sculpture. Once you have a nice layer I then add some fiber to add extra strength. When making the mold always keep in mind that you need to be able to handle it and work with it. So make it nice.
Once the plaster sets. Roughly 30 minutes. You pry the two pieces apart. You now have a perfect negative to make your pieces.
Now you can actually make the appliance.
- Pour liquid latex into the mold, making sure to coat it thoroughly, using brushes or makeup sponges to ensure the latex reaches all detailed areas.
- Allow the latex to dry before adding another layer if necessary for durability. The thickness of the latex should be sufficient to withstand application and wear.
Always be careful of the edges. You have to make sure they stay thin so application is easy and seamless.
5. Demolding:
- After the latex has fully cured (usually takes a few hours), powder the appliance then carefully peel the latex appliance out of the mold powdering as you go. The powder prevents the latex from sticking to itself. Without powder the latex will stick and the appliance will be ruined. Handle gently to avoid tearing.
- Inspect the edges of the latex for any imperfections that may need to be trimmed or smoothed out.
6. Finishing Touches:
- Use scissors or a blade to cut the edges of the prosthetic to ensure it blends well with the skin. The edges should taper off to allow for better blending with the natural skin.


