_JPEG_943092600278_1758653763.jpeg?t=1758653763)


_JPEG_943092600278_1758653763.jpeg?t=1758653956)
About this Product
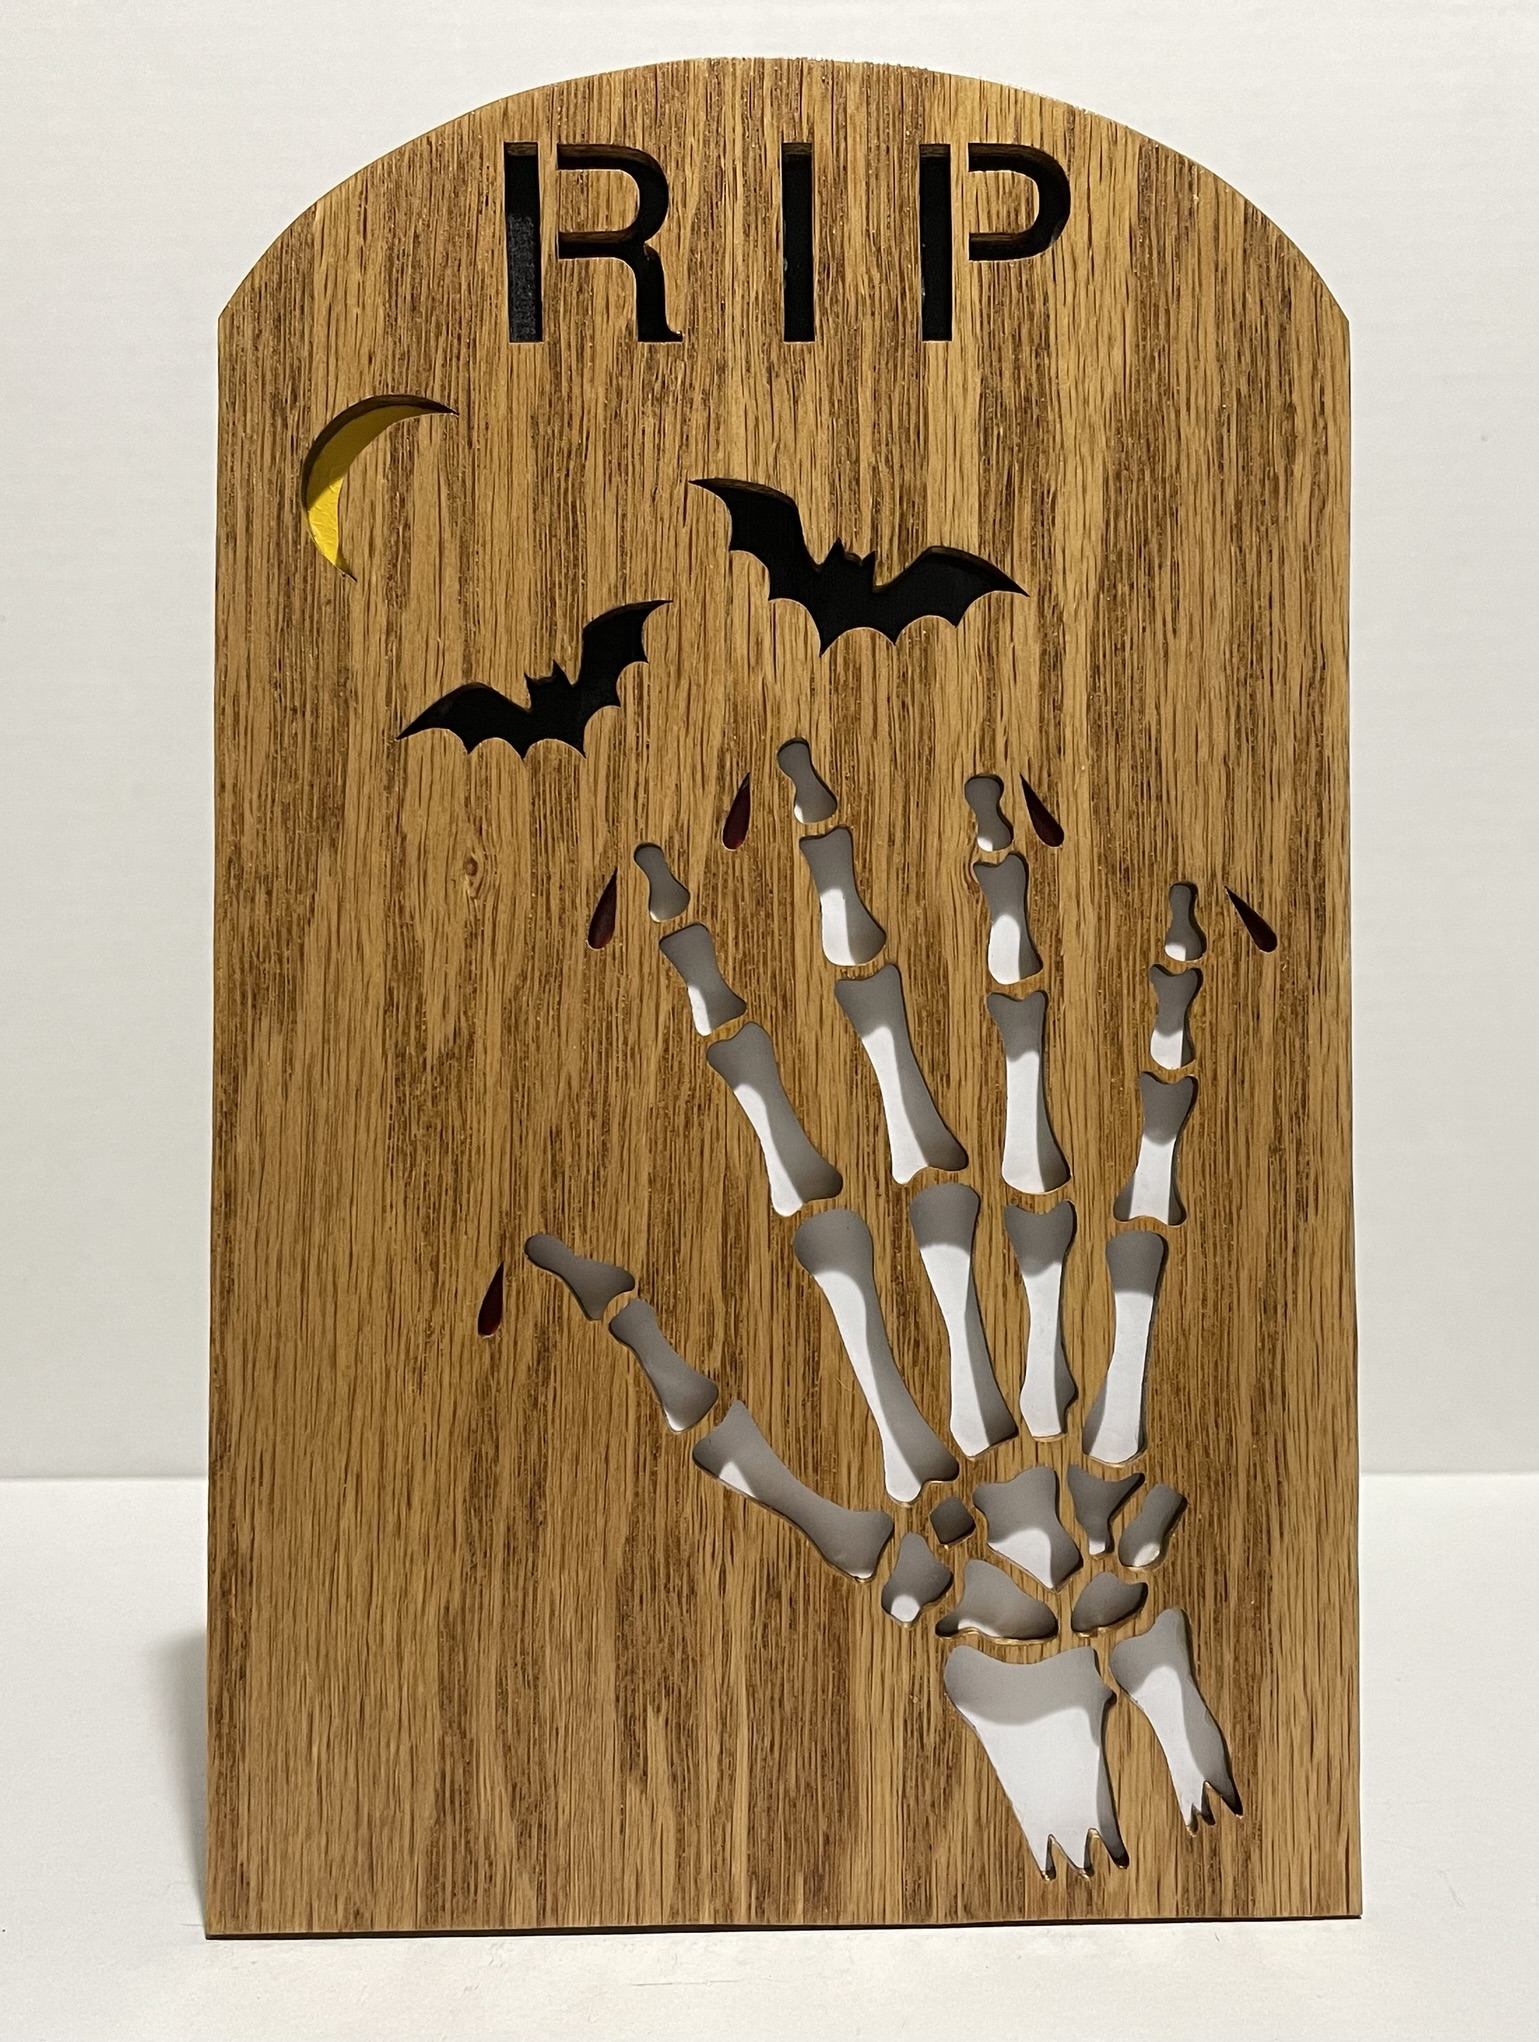
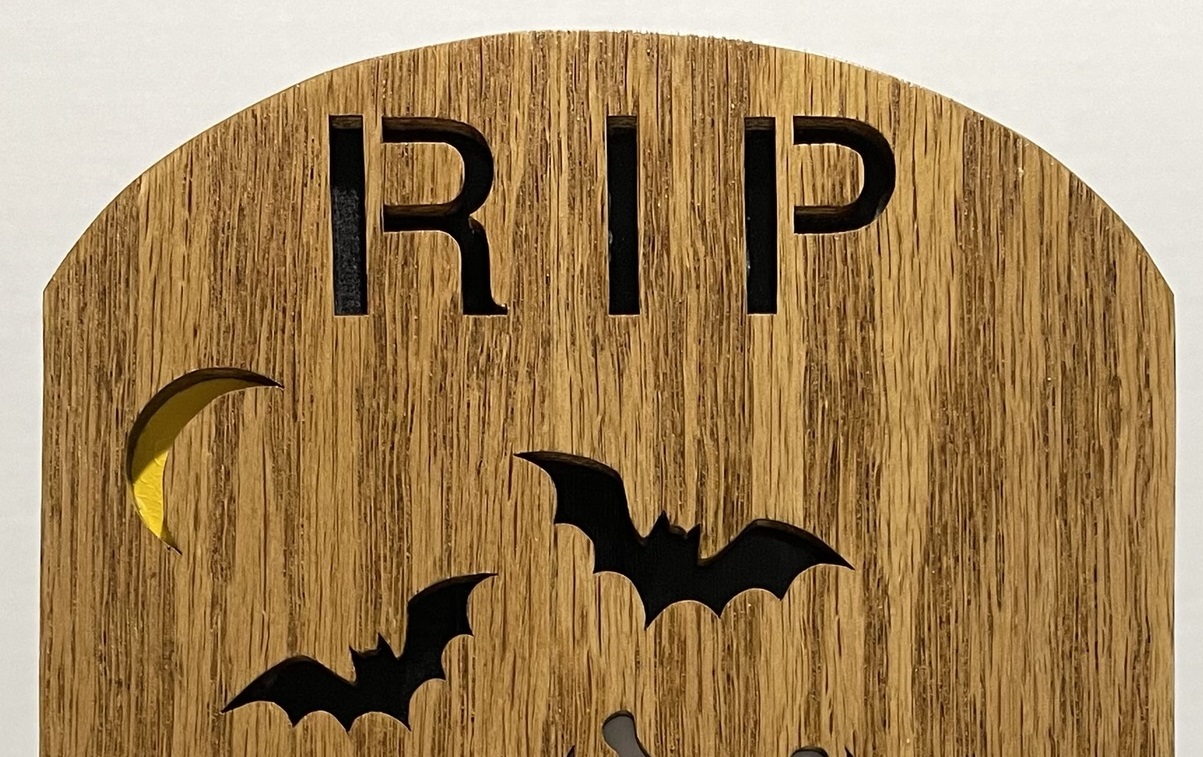
This is a scroll saw cut wooden tombstone with a Halloween theme to it. Some of the highlighted items on the tombstone are: the letters RIP, a moon, two bats and a skeleton hand with blood dripping off the fingers.
The size of the tombstone is 10 1/4" tall by 6 1/4" wide. The design was hand cut out of 1/4” oak plywood. It is then sanded and has two coats of golden oak stain applied to it. When the stain is completely dry I then spray on three coats of polyurethane. The polyurethane helps to protect the stained finish and also gives the wood a glossy shine.
The backer of each piece is hand cut from ¼” birch plywood and then it is also sanded smooth. I apply two coats of black spray paint to the backer behind the letters RIP and the bats. Two coats of yellow paint for the moon. Two coats of white paint for the skeleton hand. And finally two coats of red paint for the blood dripping off the fingers. This provides a very realistic and spooky feel to the tombstone!
The tombstone was designed by Diana Thompson and cut by Scroll Saw Treasures.
Scroll Saw Treasures
Meet the Maker
My name is Michael and I have been interested in woodworking for many years. I have always been interested in woodworking and carpentry and thought if there was a way to make a living working with my hands and wood I would love to try and make that happen.
It all started when I was in kindergarten my family decided to build a new home on our own. I really enjoyed all of the aspects of the build. This was a great way for me to learn about hard work and all of the necessary tools that are needed to make a home. Later I was involved in 4-H for many years doing very well in the woodworking category. With the guidance of my grandpa and dad I was able to learn many different aspects of woodworking. I had many different projects displayed at the state fair during my 4-H years. I think this is where I started to get my love of woodworking. I got interested in scroll saw woodworking when I received a pattern book in the mail from a pattern dealer, and as they say the rest is history!
I started sawing with my grandpa's old scroll saw and quickly wore it out. Then I bought a nicer model and wore it out too. As I continued to hone my skills I decided it was time to break down and purchase a high quality saw. I did so and have been really happy with the results I have been able to produce with it.
I am a self taught scroll saw artist. Everything I have learned has come from reading books and trial and error. The way I create my projects may not be the same way the guy down the road will do it. I have found this process works really well for me.
Here is a quick step by step process to how I take a project from a raw board to the beautiful piece you will display in your home.
1. Cut the wood to fit the pattern you are going to saw.
2. Apply blue painters tape to the wood.
3. Use spray glue to attach the pattern to the tape that is on the wood.
4. Wrap the project in packing tape. This helps extend the life of the sawblade.
5. Cut the exterior of the pattern.
6. Drill all of the interior holes.
7. Thread the scroll saw blade in each hole and cut the interior designs. This can happen hundreds of time on some projects. Depending on the amount of detail in each piece.
8. Remove the pattern from the wood.
9. Carefully sand the project.
10. Blow all the dust off the cutting.
11. Apply two coats of stain.
12. Apply three coats of poly.
13. Remove any little "fuzzes" that the poly process adds to the cutting.
14. Apply a hanger.
15. Attach a label with my contact information on it as well as a label to give credit to the pattern designer if I did not design the piece.
16. Prepare the cutting for shipping.
17. Your job: DISPLAY WITH PRIDE!!!
As you can tell from all of the steps involved this is a very detailed and complex process, but once the project is complete it provides you with a great sense of accomplishment. It is my hope that you will enjoy and see the value of each and every cutting that I produce.
I have been scrolling for over 20 years now. Wow how the time flies! I am in my early 40's and single. I enjoy spending time with my niece and nephew, being outdoors, doing lawn care, helping other people in need and spoiling my basset hound! I live in rural Indiana and have sold items online to 44 of the 50 United States. My goal is to hit all 50! I have even sent a few item out of the country, with my very first online sale going to Australia!

How it’s Made
The design was cut out of 1/4” oak plywood. Once I apply the pattern I am going to use to the wood I then cut out the exterior shape of the piece. The next thing I do is carefully drill all of the holes into the oak wood that represent areas that I will cut out. Then it is time to thread the thin saw blade in each hole and follow the pattern to remove that section. Once that hole is completed it is time to re thread the blade in the next hole. Once I am done cutting the design it is sanded smooth. First I use 200 grit sandpaper and then work my way up to 400 grit to provide a super smooth finish. Following the sanding I blow all of the dust off of the cutting and then applied two coats of golden oak stain. When the stain is completely dry I then spray on three coats of polyurethane. The polyurethane helps to protect the stained finish and also gives the wood a glossy shine.
The backer of each piece is cut from ¼” birch plywood and then it is also sanded smooth. First I use 200 grit sandpaper and then work my way up to 400 grit to provide a super smooth finish. Following the sanding I blow off all of the dust from the backer piece and it is ready to be painted. I apply two coats of black spray paint to the backer behind the letters RIP and the bats. Two coats of yellow paint for the moon. Two coats of white paint for the skeleton hand. And finally two coats of red paint for the blood dripping off the fingers.
The next step is to glue the design piece to the backer. I allow the glue to set up 24 hours and then I work to remove small bits of fuzz that the polyurethane process leaves behind on the design.
Then it is time to attach the hanger so once you receive the tombstone it is ready for you to hang up and enjoy for years to come!
Shop Policies
Welcome to Scroll Saw Treasures! I hope you enjoy checking out my site and if you have any questions please send me a message and I will try my best to help you out. Here at Scroll Saw Treasures each piece of art I create is made all by hand using a scroll saw. No two items will ever be exactly alike. I take a great amount of pride in creating my items using the old fashioned ways and tools. I hope you enjoy your visit and if you have any questions please send me a message! My name is Michael and I have been scroll sawing since 2005. I take a great amount of pride in each project that I cut. All of my items are high quality and I am sure you will enjoy them. You will not find any laser work here. Although many people at art and craft shows think that they are cut using a laser. Most of the items that I have for sale are cut out of 1/4" oak plywood with a 1/4" birch backer. Each item gets two coats of oak stain and three coats of poly for protection. Please note that once I sell an item I will make a new one and then re-list the item for sale. I am able to save a lot of time doing this since I do not have to take new pictures and edit them each time I sell an item. By doing that the project that you order may have a different grain pattern to the wood than the one that is pictured. Other than that the pieces will be the same.
All sales are final. Once I have received your payment I will not cancel your order.
I don't accept returns or exchanges. All items leave my shop in perfect condition. They will be shipped in a white sturdy box where they are shipped wrapped in bubble wrap and the box filled with packing paper. If however your item is damaged during the shipping process please let me know and I will work with you to make it right.
I will never sell or give your personal information to anyone. I just use it to ship your order and document on my own personal records what state you are from. I'm trying to reach my goal of shipping to all 50 states!
Thanks for stopping by and be sure to check back often for new items.
I enjoy providing you with quality hand sawn, painted and stained decorative woodworking pieces.


